INSTALLATION GUIDES
FOR MOBILE PRESETS
1. After payment is accepted, you will receive an email to download your mobile preset pack. Open the email with your smartphone and press the download link.

2. Wait for the download to complete and open the zip-file by clicking on it.
3. If your smartphone has a built-in zip extractor the folder with the separate presets will be visible immediately. Open the folder and you'll see a number of different files (.DNG or Camera Raw Images): these are your presets. If your smartphone doesn't have a built-in zip extractor, you can download one in the App Store such as 'Zip Extractor' for iPhone or 'Zarchiver' for Android and open the zip-file with it.
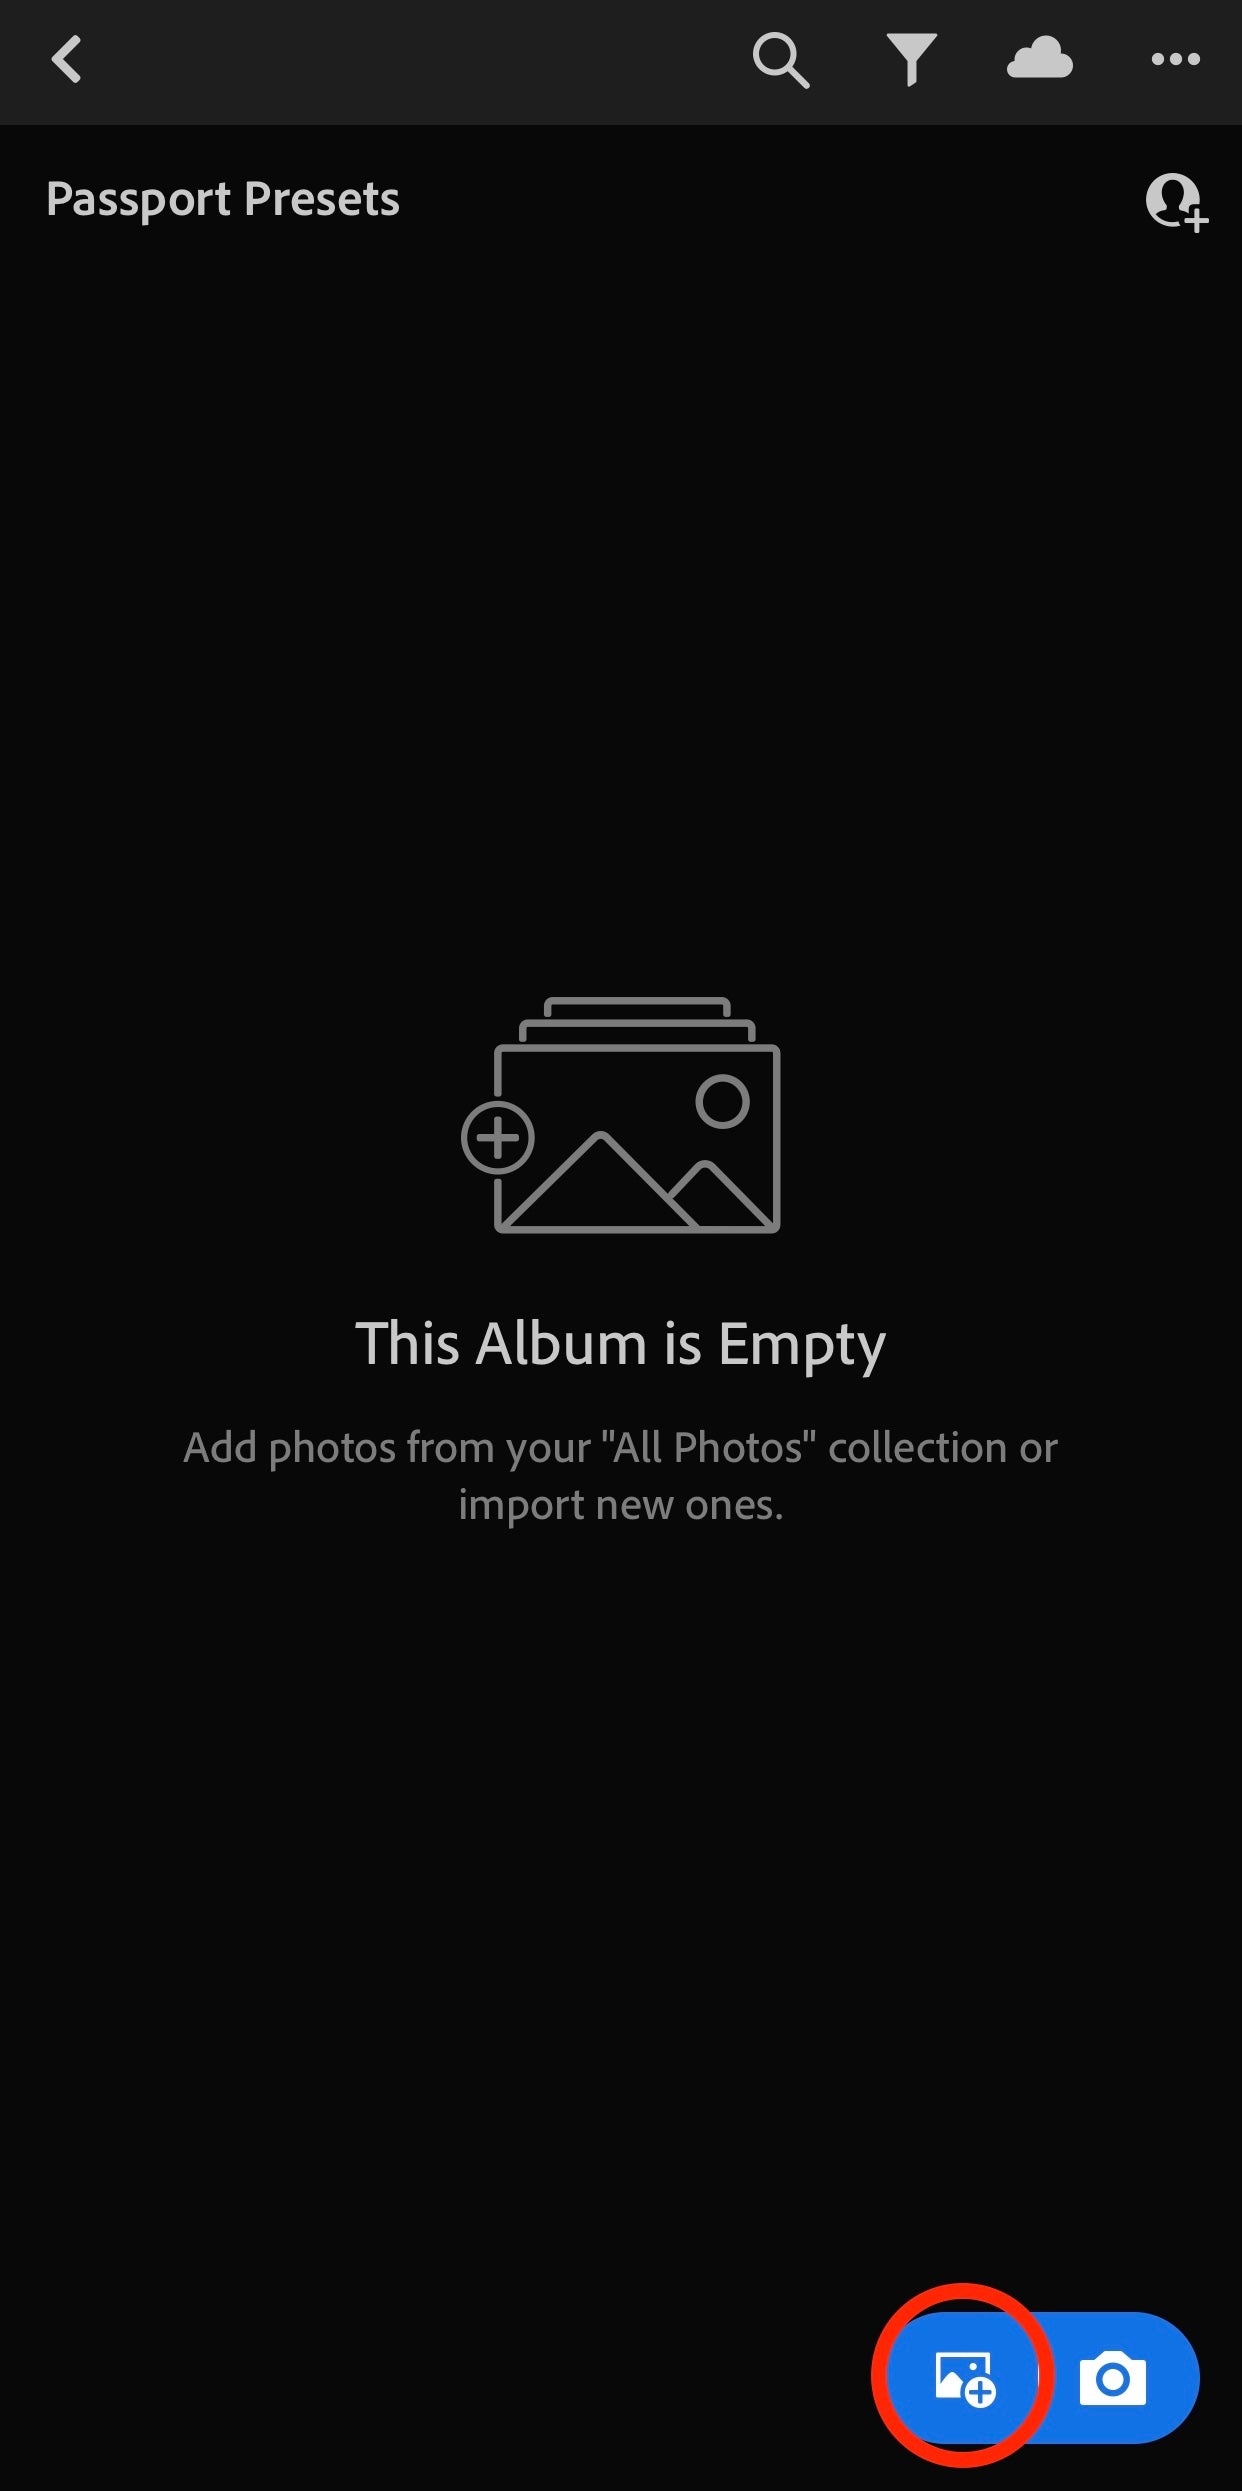
4. Open the Lightroom app and create a new album. Give it a name (like The Creator Farm presets).


5. Tap the 'add photo' button in the bottom right corner and choose 'From Files'.

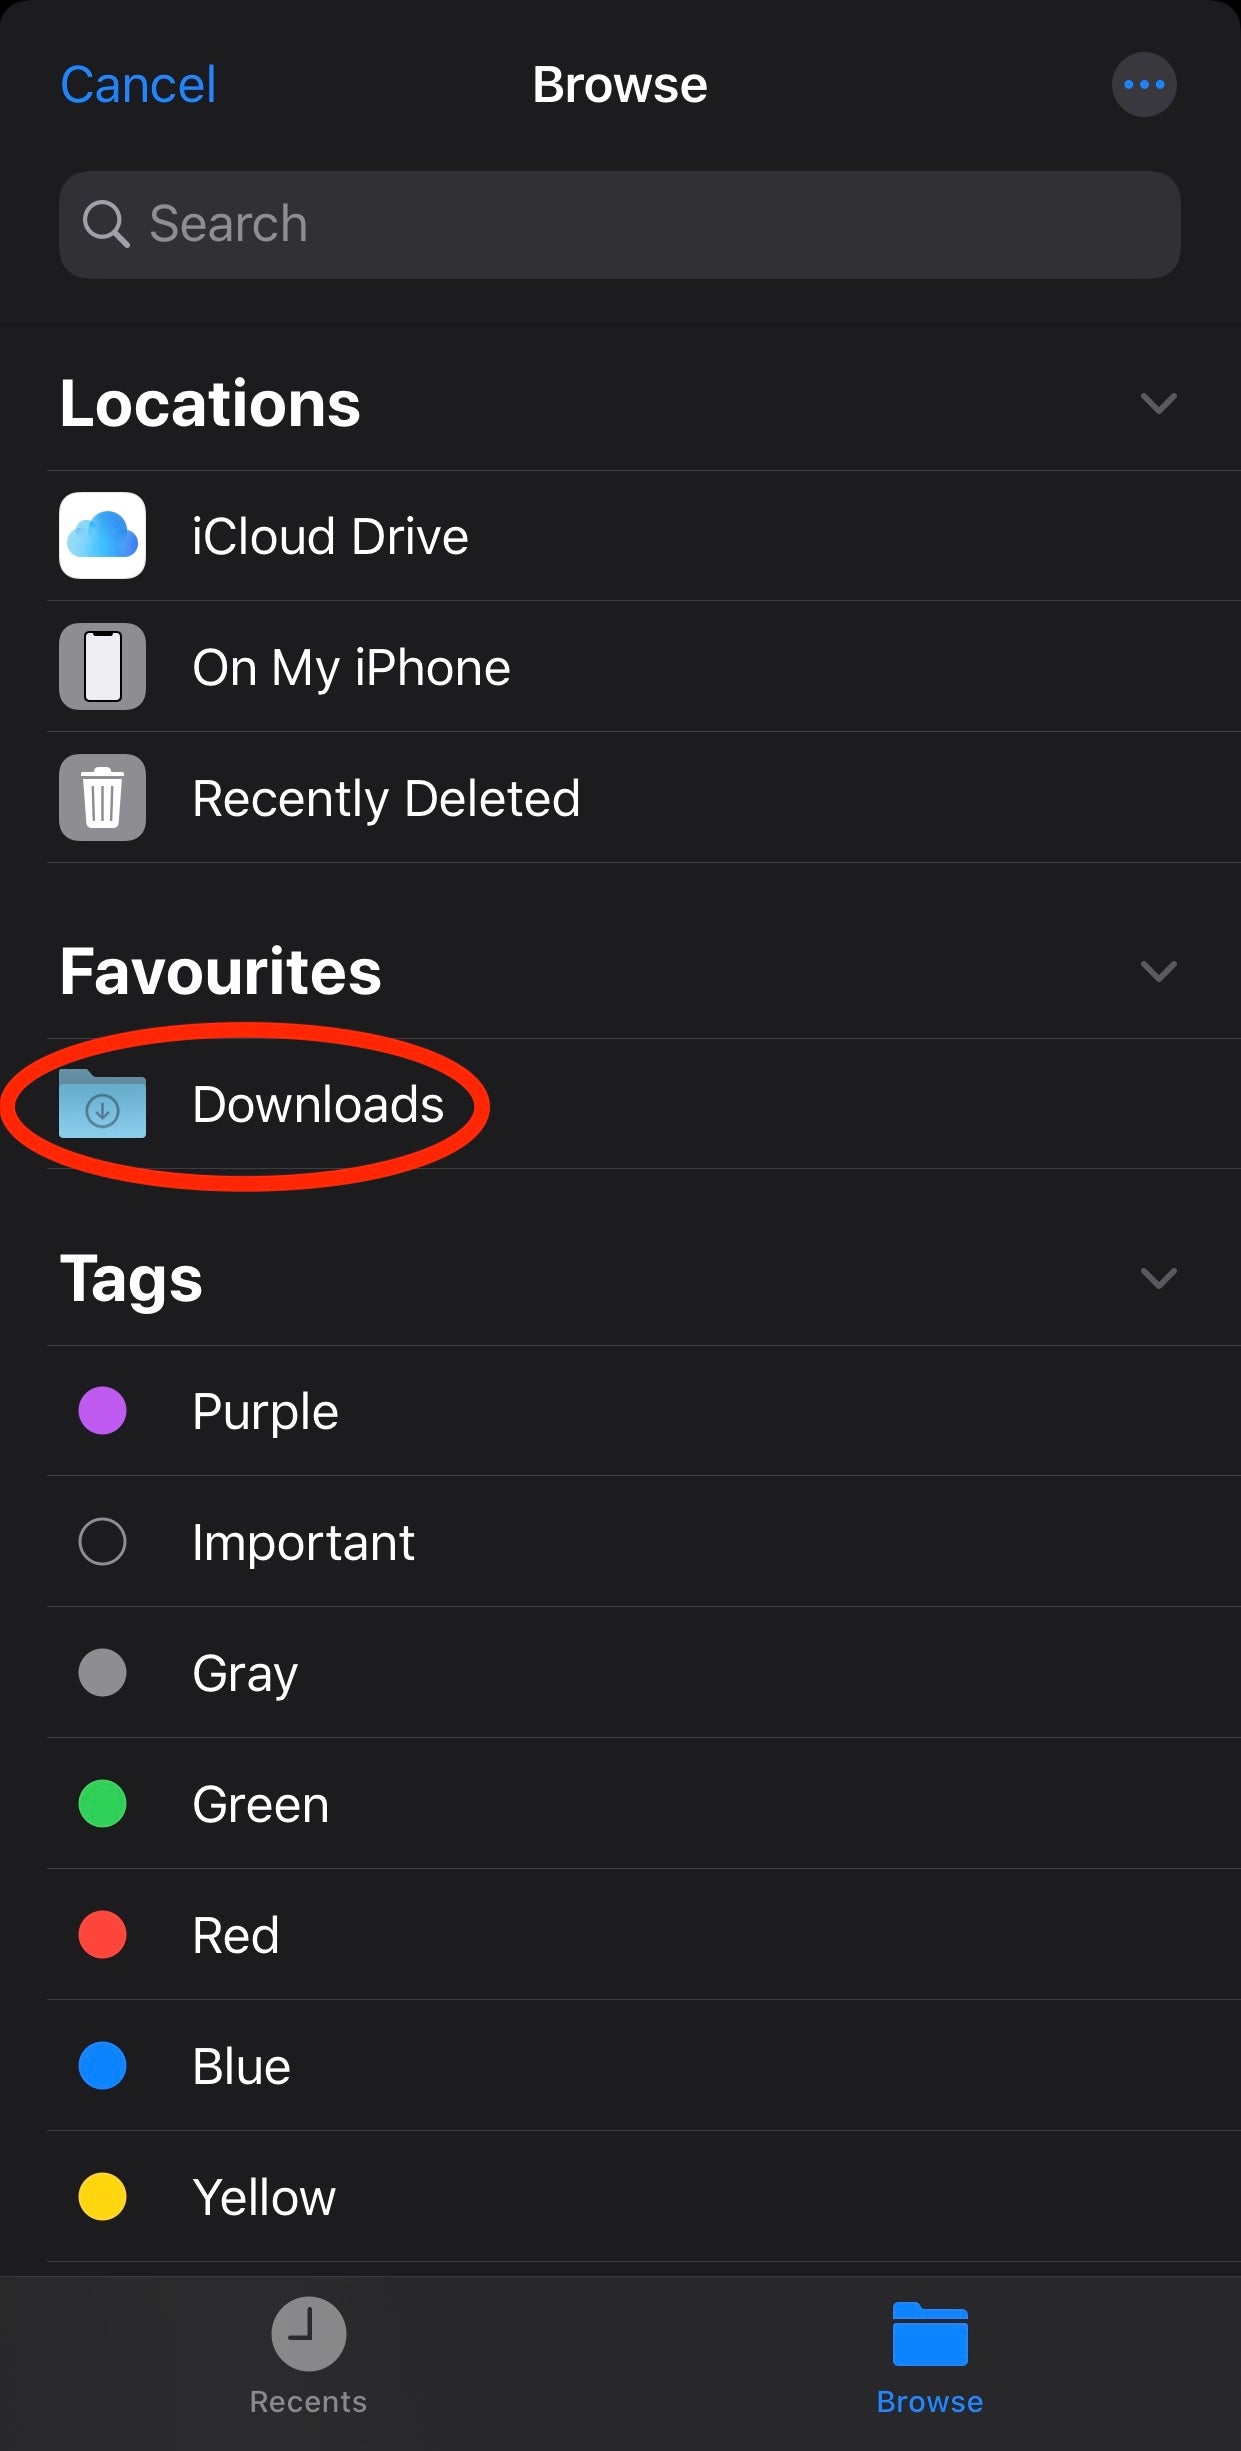
6. Go to your 'Downloads' folder, select all the presets and open them. They are now in your new Lightroom album.


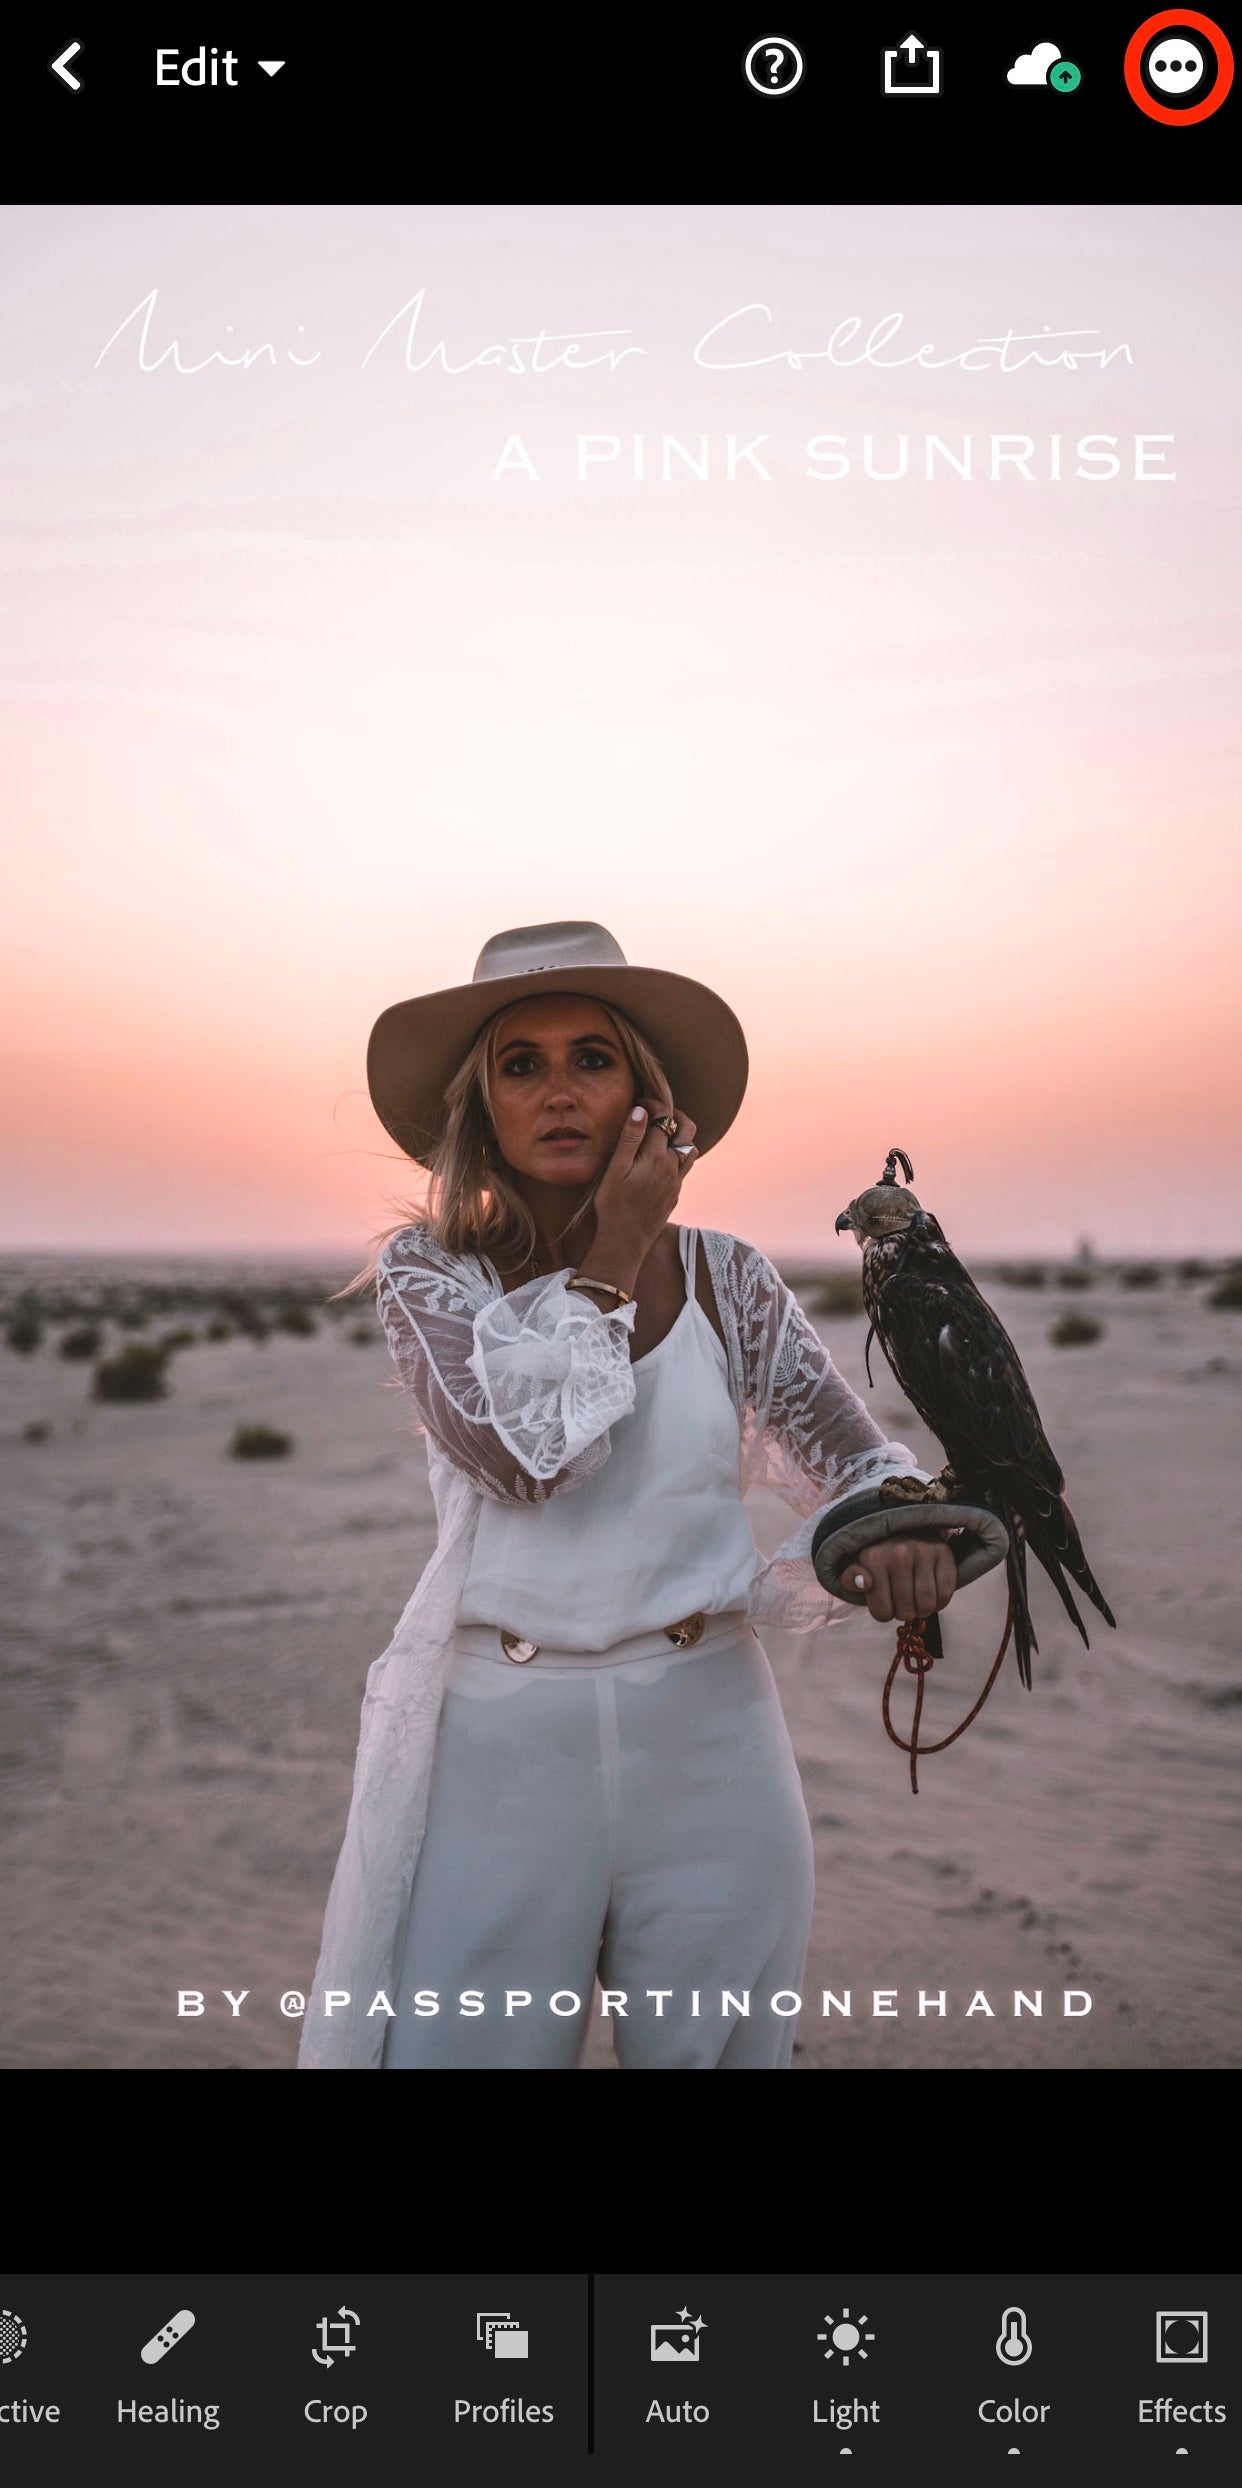
7. Click on a file to open it and then press the three dots in the upper right corner. Tap on 'Create Preset', give your preset a name and save it by clicking on the '✔️' to save it. Repeat for all files until every preset has been saved. Don't worry, you only need to do this once!


2. Wait for the download to complete and open the zip-file by clicking on it.
3. If your smartphone has a built-in zip extractor the folder with the separate presets will be visible immediately. Open the folder and you'll see a number of different files (.DNG or Camera Raw Images): these are your presets. If your smartphone doesn't have a built-in zip extractor, you can download one in the App Store such as 'Zip Extractor' for iPhone or 'Zarchiver' for Android and open the zip-file with it.
4. Open the Lightroom app and create a new album. Give it a name (like The Creator Farm presets).
5. Tap the 'add photo' button in the bottom right corner and choose 'From Files'.
6. Go to your 'Downloads' folder, select all the presets and open them. They are now in your new Lightroom album.
7. Click on a file to open it and then press the three dots in the upper right corner. Tap on 'Create Preset', give your preset a name and save it by clicking on the '✔️' to save it. Repeat for all files until every preset has been saved. Don't worry, you only need to do this once!

8. To use the preset, just open the picture you want to edit in Lightroom and in the bottom panel press 'Presets' and click on the preset you want to use.
!!!TIP!!! make sure to save the files on your computer as well or on a hard drive so you can access them for a life time even if you're changing phones.
FOR DESKTOP PRESETS
1.
After payment is accepted, you will receive an email to download your desktop preset pack. Open the email with your computer and click the download link.
2. Once downloaded, unzip the zip-file by double clicking it.
2. Once downloaded, unzip the zip-file by double clicking it.
3. Open Lightroom Classic CC on your computer and go to 'Develop'. Click on the '+' sign next to Presets, followed by 'Import Presets'. 
4. Go to the folder where you saved the zip-file initially and select all the presets and press 'Import'.


FOR VIDEO FILTERS/LUTs
1. After payment is accepted, you will receive an email to download your mobile video filters. Open the email with your smartphone and click on the download link.
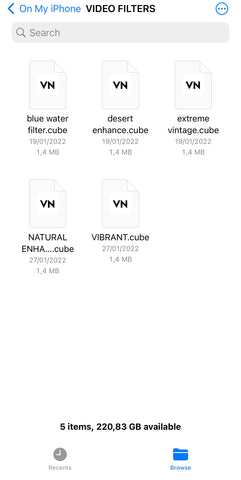
2. Once downloaded, the files will be saved under 'files' on your phone. Go to files and replace or adjust wherever you want them in your files.
3. Download the 'VN Video Editor' app on your phone and open it.

4. Now import the video filters one by one in VN by going to 'filters' -> click on '+' -> click on 'import from File App' -> go to the folder where you saved the video filters and select one of the filters. Do this for every video filter. They are now added to your VN app.


5. Now try out the filters by clicking on '+' -> click on 'new project' -> select any video from your phone -> one you have your video -> click on filter and select one of the video filters. We highly recommend to adjust the intensity of the filter by using the slider and play around with this to get it just right.


Note that not every photo preset or video preset works on every piece of content and that this also depends on personal preference. That's why we created a wide range of different edits so there will always be at least 1 filter that works.
Questions? Please email hello@thecreator.farm